- Extensible Integration Framework: Exposing core Dynamics 365 Finance & Operations business logic externally via standardized REST endpoints.
- X++ Service & Service Group Architecture: Developing service classes, binding operations in AOT, and grouping services into deployed endpoints under
/api/services/. - Microsoft Entra ID (Azure AD) Security: Registering service applications, acquiring OAuth 2.0 Bearer tokens, and authorizing API access in D365FO.
- JSON Parameter Contracts: Passing complex parameters (e.g. Sales Order and calculation amounts) and returning structured calculation payloads.
- Postman Verification: End-to-end testing of authentication, token handling, and automated computation of
computeTotalTaxandcomputeOnlyTaxoperations.

Overview: Custom Services in Dynamics 365 F&O
In this blog post, we’ll explore the process of creating custom services in Dynamics 365 Finance and Operations, empowering you to extend the capabilities of your ERP system to meet the unique needs of your business. Whether you’re looking to integrate with external systems, automate processes, or enhance user experiences, custom services offer a flexible and powerful solution.
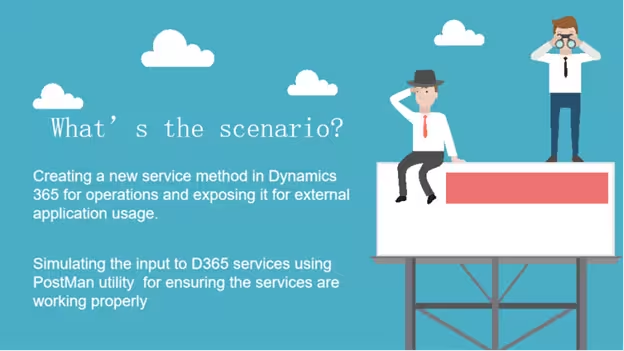
Let’s take a scenario where Dynamics is holding the data and that data can be exposed outside by using a service. We will explore how to create a service from Dynamics, expose it externally, and test it within Postman to ensure seamless third-party interaction.
Tools Required:
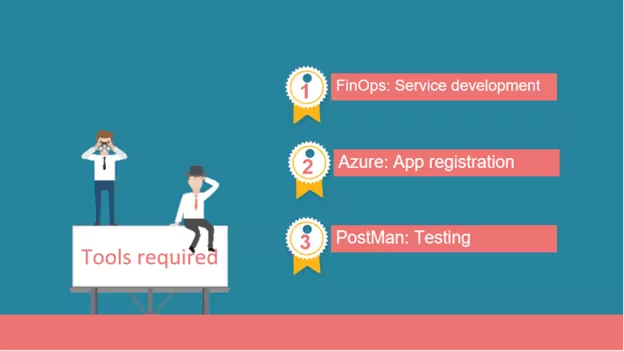
Visual Studio 2022 / D365 Developer Tools
For authoring X++ classes, services, and service groups in the AOT.

Postman API Client
For OAuth 2.0 token acquisition and RESTful service endpoint validation.
“Custom services provide the cleanest, most performant approach when external enterprise systems need to trigger transactional business logic inside D365FO and receive synchronous computation results.”
Step 1: Create Project & X++ Service Class
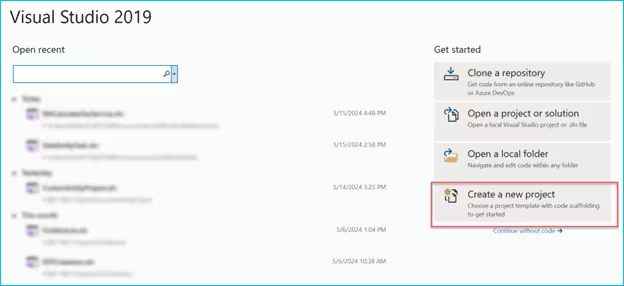
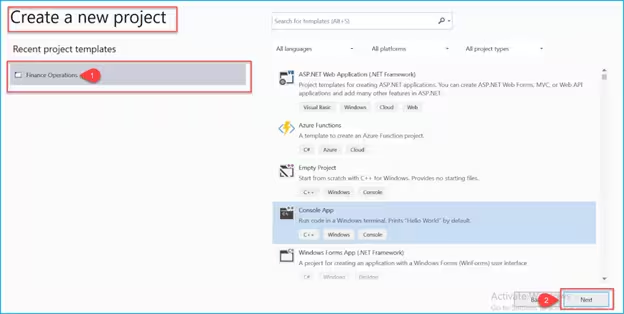
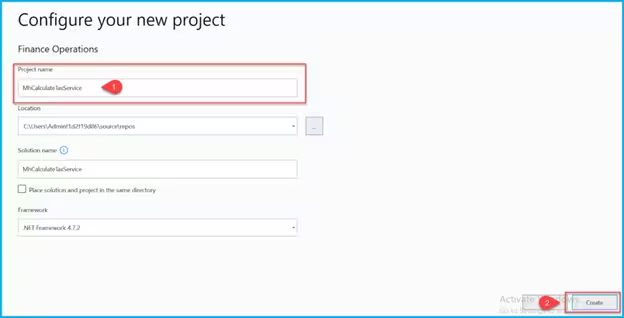
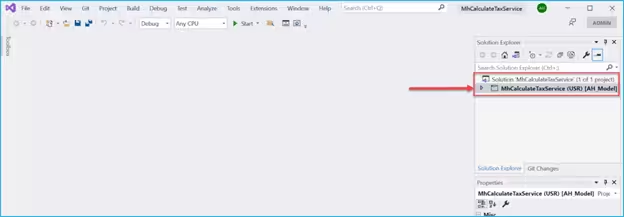
Open Visual Studio and create a new Dynamics 365 project:
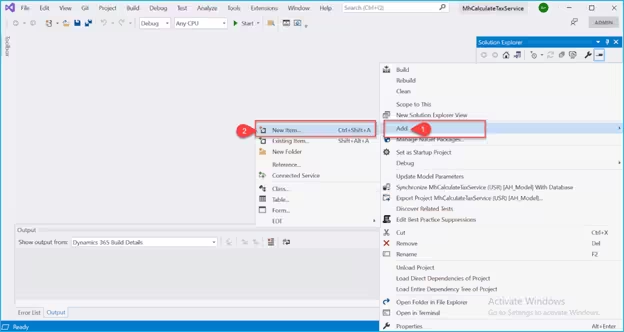
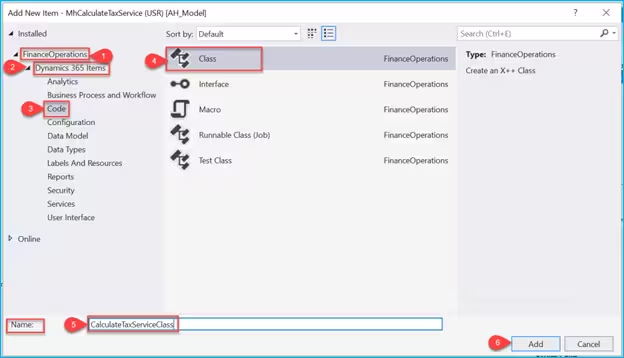
Add a new class to your project by selecting Add > New Item > Dynamics 365 Items > Code > Class:
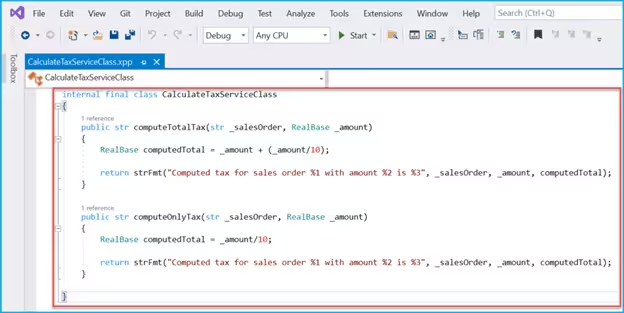
Paste the following X++ code into the class. The class defines two service operations: computeTotalTax (returning total amount including tax) and computeOnlyTax (returning exclusively the computed tax amount):
internal final class CalculateTaxServiceClass
{
    public str computeTotalTax(str _salesOrder, RealBase _amount)
    {
        RealBase computedTotal = _amount + (_amount/10);
        return strFmt("Computed tax for sales order %1 with amount %2 is %3", _salesOrder, _amount, computedTotal);
    }
    public str computeOnlyTax(str _salesOrder, RealBase _amount)
    {
        RealBase computedTotal = _amount/10;
        return strFmt("Computed tax for sales order %1 with amount %2 is %3", _salesOrder, _amount, computedTotal);
 }
}
Step 2: Create Service & Service Operations
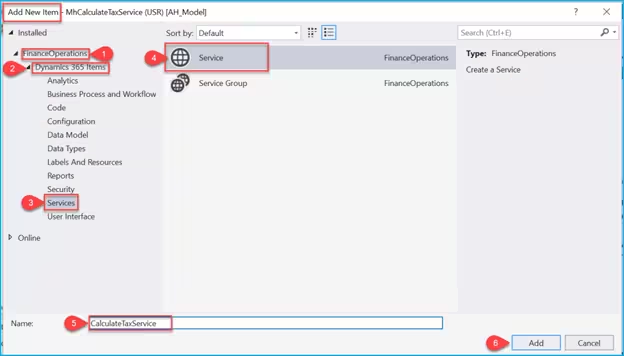
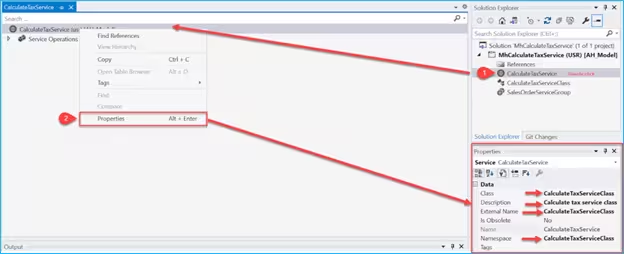
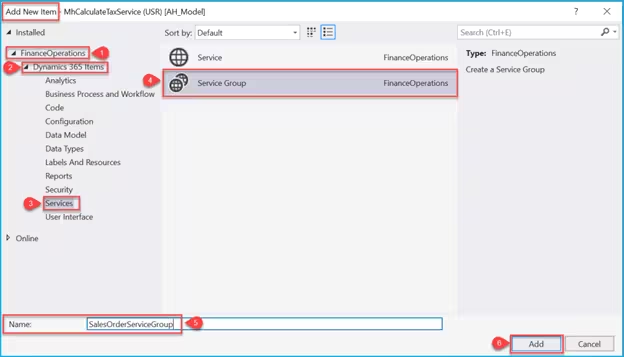
Right-click your project, select Add > New Item > Dynamics 365 Items > Services > Service. In the service properties, specify your class name in the Class property:
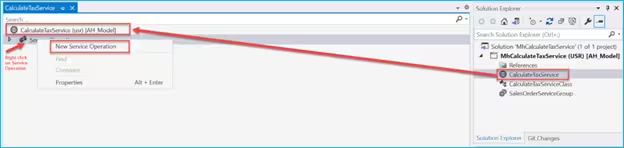
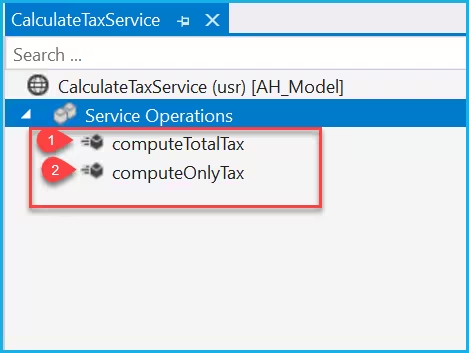
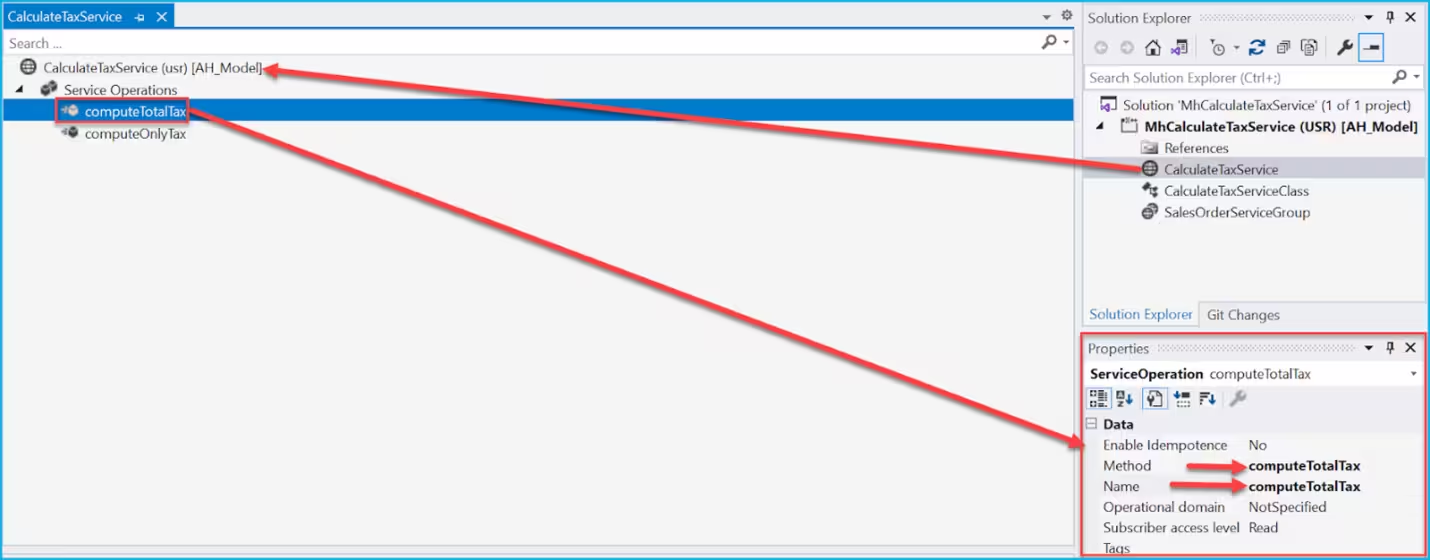
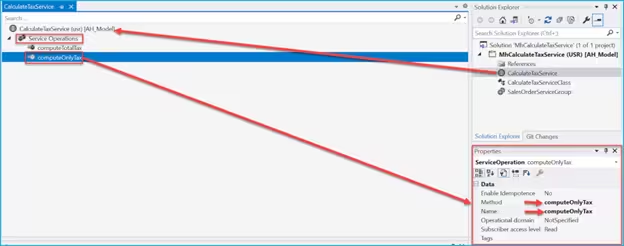
Next, create two Service Operations under the Service node matching the method names in your class:
Step 3: Create Service Group & Deploy
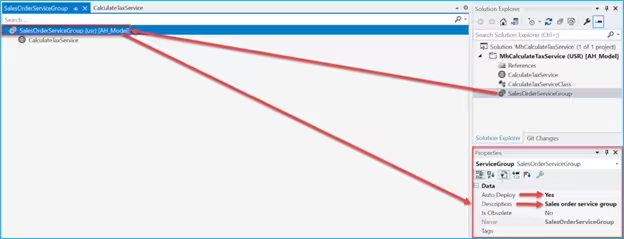
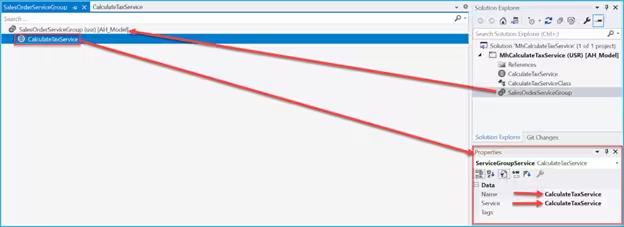
To expose the service via HTTP REST endpoints, we must bundle it into a Service Group. Add a new Service Group item, drag and drop your Service into it, and set the properties:
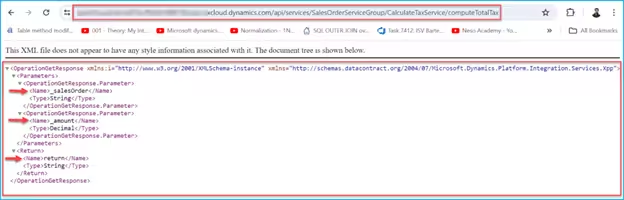
Once built, the custom service endpoint follows the standardized Dynamics 365 URL pattern:
https://[DynamicsURL]/api/services/[ServiceGroup]/[Service]/[ServiceOperation]Step 4: Register App in Microsoft Entra ID (Azure Portal)
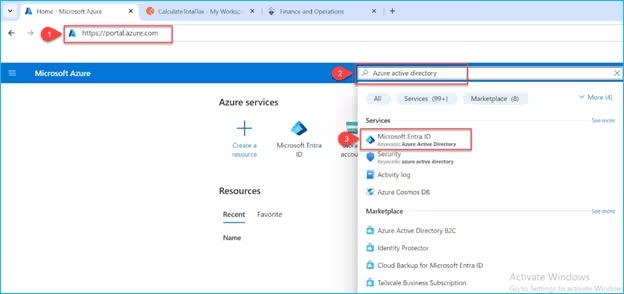
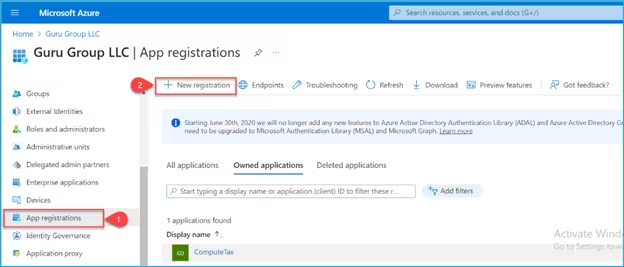
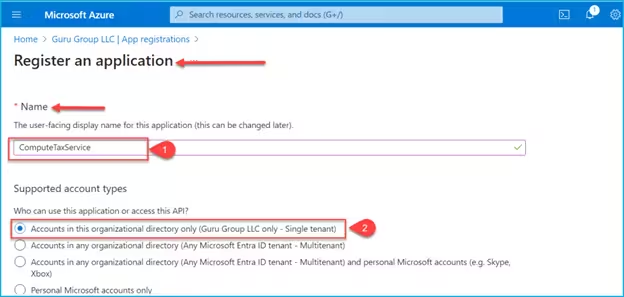
Navigate to portal.azure.com to register the application that will authenticate API requests:
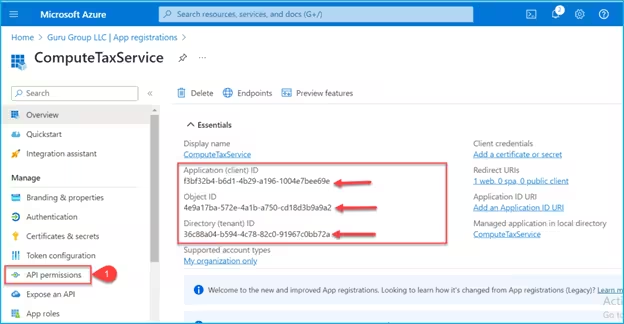
Record the Application (client) ID, Object ID, and Directory (tenant) ID:
Configuring API Permissions
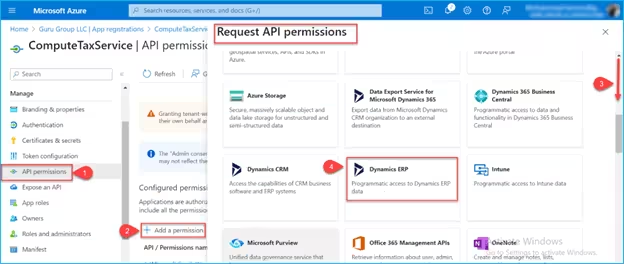
Click API permissions > Add a permission. Configure both Delegated and Application permissions for Dynamics ERP, and have your tenant administrator grant consent:
Generating Client Secret & Authorizing in D365FO
Navigate to Certificates & secrets, click New client secret, and copy the Secret Value:

Now open D365FO, navigate to System administration > Setup > Microsoft Entra ID applications, and add the Client ID mapped to an authorized integration user ID:
Step 5: Testing & Verification via Postman
Launch Postman, create a workspace and collection, and configure an OAuth 2.0 token request using the Client Credentials flow:
Copy the returned Bearer Token. Now execute the POST request targeting the custom service endpoint:
POST https://[DynamicsURL]/api/services/CalculateTaxServiceGroup/CalculateTaxService/computeTotalTax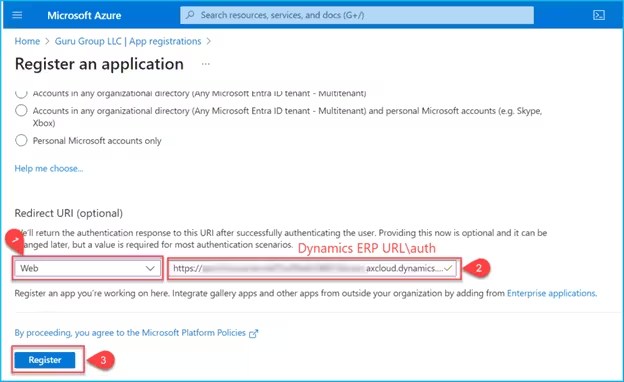
Similarly, execute the second service operation computeOnlyTax to verify tax-only calculations: