- No-Code Report Formatting: Utilizing Excel worksheets as dynamic runtime templates for Microsoft Dynamics 365 Electronic Reporting (ER).
- Named Range Data Contracts: Defining single-cell and table-level Excel named ranges that bind directly to ER format components.
- Derived Configuration Management: Creating child ER format configurations from Microsoft repository baselines without breaking upgrade compatibility.
- Template Attachment Workflow: Downloading, modifying formulas/styles via Name Manager, and re-attaching updated workbook templates.
- Production Governance: Maintaining consistent corporate branding, calculations, and compliance across financial business documents.

Creating a New Custom Report Template
To create a new custom Electronic Reporting template, start by opening Microsoft Excel. Type all the required field names as column headers. Next, select the header row along with the row beneath it, navigate to the Formulas tab, and select Create from Selection.
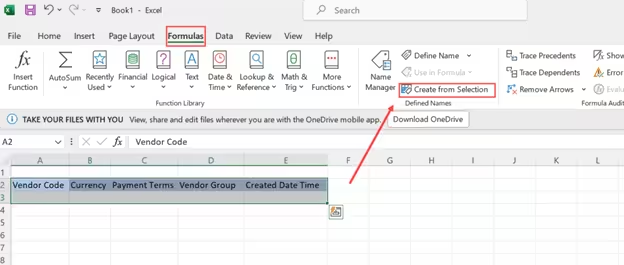
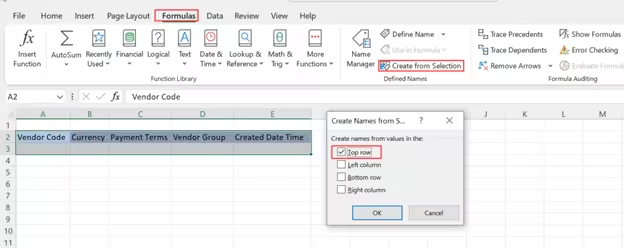
In the dialog box, ensure the Top row checkbox is enabled and click OK:
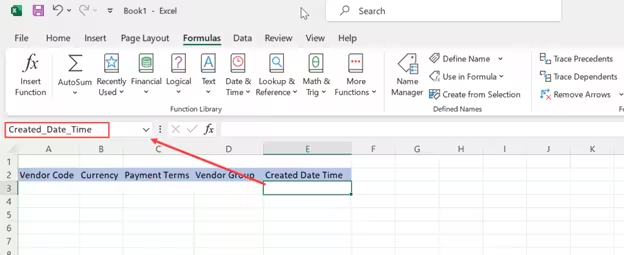
Now the value of each field cell is directly associated with its corresponding field name. You can verify this by checking the Excel Name Box for individual cell addresses:
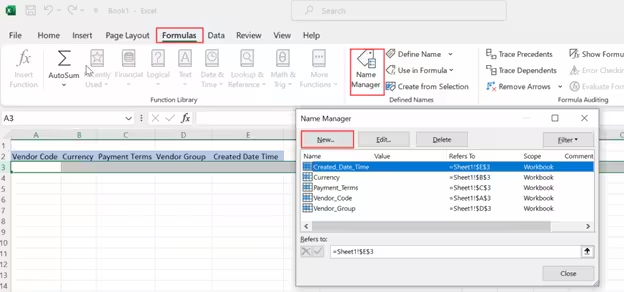
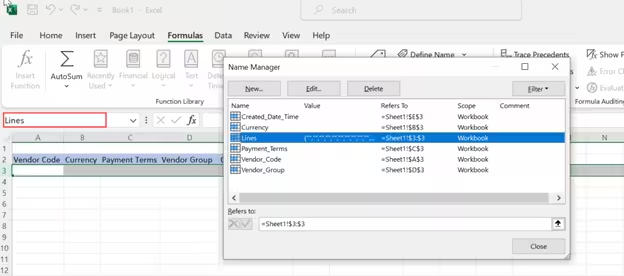
After defining individual cell names, select the complete data row and assign it a range name (for example, ReportLines). This range will be referenced in the ER format designer to repeat records dynamically:
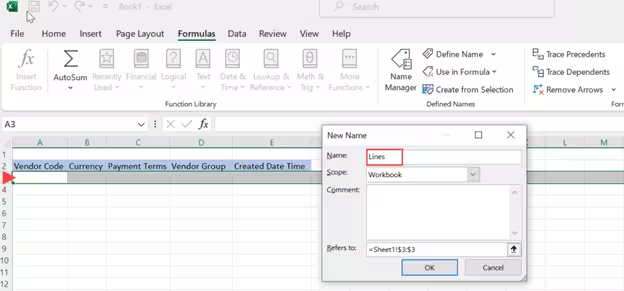
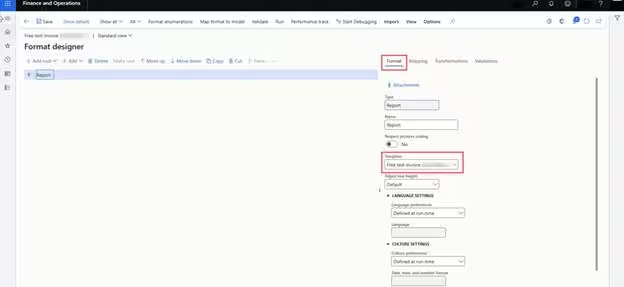
Set the name of the worksheet, save the Excel workbook, and attach it to your custom ER format configuration in Dynamics 365 Finance & Operations.
“Using Excel templates in Electronic Reporting provides business analysts with complete design autonomy over fonts, colors, and formulas without writing a single line of X++ code.”
Modifying an Existing Report Template
To enable new ER functionality or modify standard business documents, adjustments can be made directly to the Excel template attached to an existing format configuration.
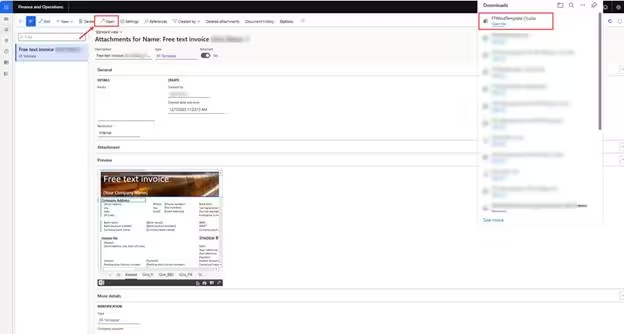
Create a new derived format configuration in the Electronic Reporting workspace, select your format, and click the Attachments button:
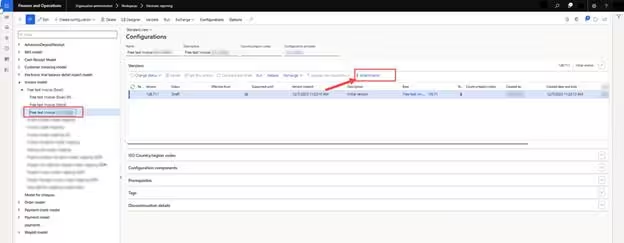
Click Open to download the original Excel template to your local workstation:
Updating Ranges in Excel Name Manager
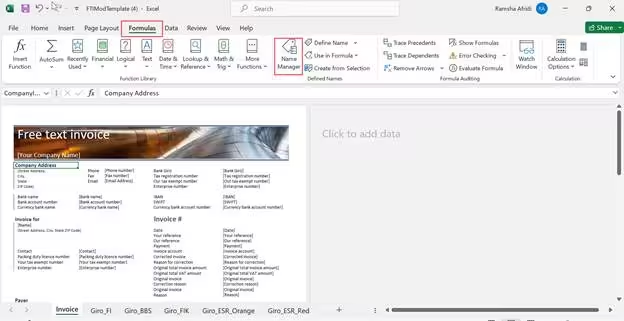
Open the downloaded template in Excel. Navigate to Formulas > Name Manager to review, edit, or create new named ranges:
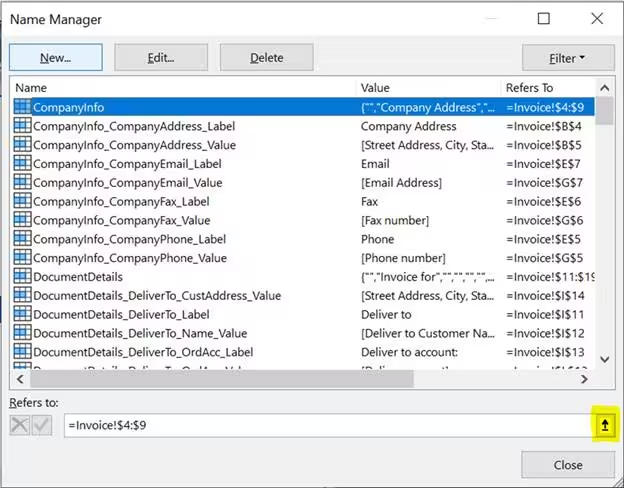
You can now create new ranges, adjust existing coordinate references, update formatting or logos, add Excel formulas (such as SUM or VLOOKUP), and save the workbook:
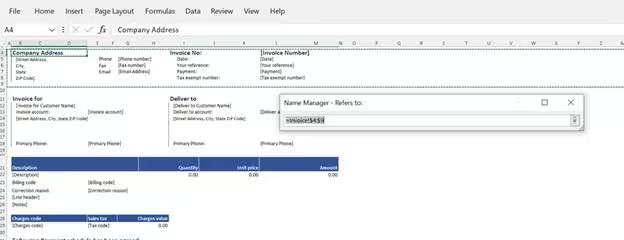
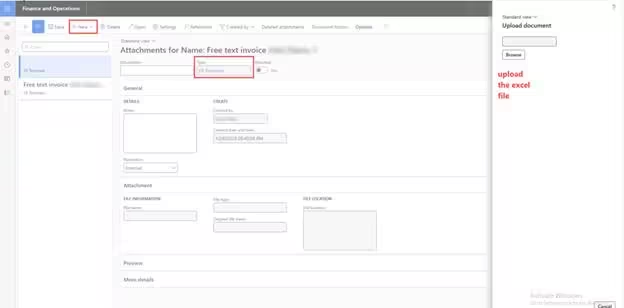
Re-uploadsing and Verifying the Template in D365FO
Return to Dynamics 365 Finance & Operations. Under the Attachments form of your ER format, uploads the modified workbook as a new file attachment. Open the ER Format Designer and verify that the newly defined named ranges appear in the format tree ready for data mapping: